Stage 3: Alignment to Anterior and Posterior Commissure (ACPC)
|
Stage summary: The T1-to-ACPC rotation matrix is automatically generated however,
we suggest checking to ensure that the rotation matrix is correct. |
ITK-SNAP keyboard shortcuts
ACPC alignment video demo
Procedure overview
- Open ITK-SNAP
- Load the 0.86 voxel size isotropic T1 MRI: {session}_T1_IHCpre_iso_086
- Load the automatically generated T1-to-ACPC rotation matrix: {session}_T1_IHCpre_toACPC.mat
- Check pitch using axial slice showing the ACPC and edit if necessary
- Check roll using the axial slice showing the eye balls and edit if necessary
- Check yaw using the longitudinal fissure and edit if necessary
- Shift the brain so it is located roughly in the centre of each orientation window and save over the old matrix file
Load greyscale image
- Load {session}_T1_IHCpre_iso_086 (0.86 isotropic greyscale image) by clicking File > Open Greyscale Image and selecting the file
- Click ‘+’ button in the top right corner of the axial image to expand the axial view
- Adjust intensity (CTRL-I) as described in Stage 2
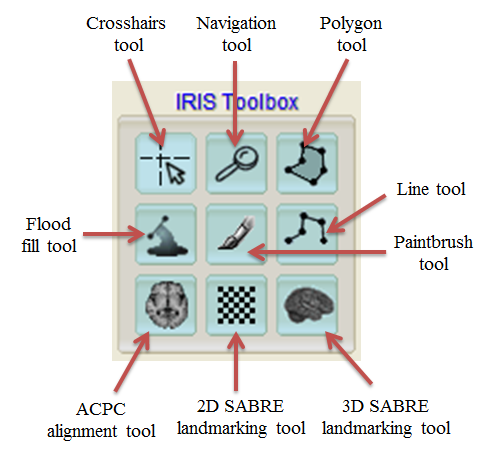
- Select the ‘Navigation tool’ from the top left menu to zoom (right-click and drag mouse up or down) and pan (left-click and drag) the image into place
Load the ACPC rotation matrix file
- Click the ‘ACPC alignment tool’
- Load ‘ACPC_Auto’ matrix file {session}_T1_IHCpre_toACPC.mat using load option in bottom left hand corner
Check pitch
- Elevate through the brain by changing the increment to the number of slices you wish to jump and clicking the elevate arrows
- Check pitch by finding the axial slice where the anterior commissure (AC) and posterior commissure (PC) are clear
- The AC should be bright and its projections should be U-shaped and continue between the caudate and lentiform nuclei. The PC should be bright and lie flat against the 3rd ventricle. The 3rd ventricle should be keyhole shaped
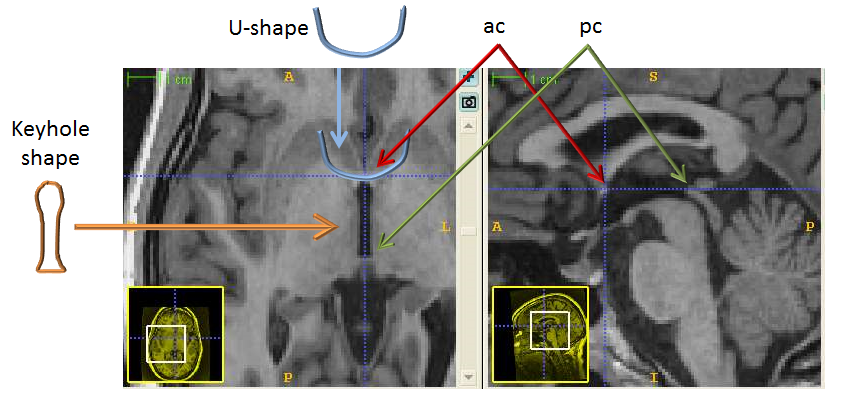
- Manual adjustment (if necessary): Change increment to 1 and elevate up or down until AC is at its brightest. Click pitch arrows until the PC is clear and 3rd ventricle is key shaped (elevation may need to be changed throughout this process)
- Once correct, do not edit pitch during the roll or yaw steps
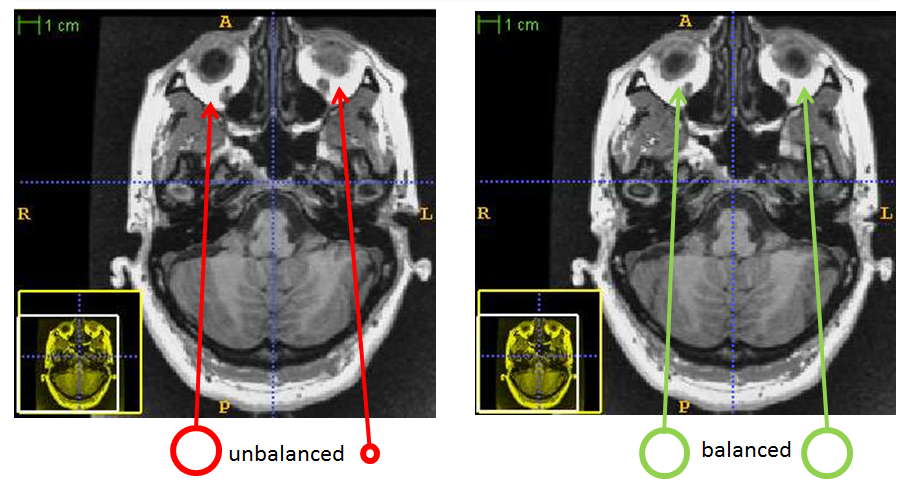
Check roll
- Elevate through the brain to find axial slice showing the eye balls and check that they are equal in size
- Manual adjustment (if necessary): click the left and right roll arrows until the eye balls are equal in size
- Once roll is correct, do not edit during the yaw steps
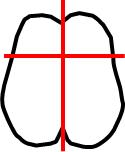
Check yaw
- Press ‘x’ key to turn on crosshairs and click on the longitudinal fissure
- Elevate up and down the brain to ensure that the longitudinal fissure runs parallel to the vertical crosshair
- This can also be checked by viewing the brain in sagittal view. When the vertical crosshair properly overlays the longitudinal fissure, very little brain should show in sagittal view
- Manual adjustment (if necessary): Click the left and right yaw arrows to line up the longitudinal fissure with the vertical crosshair
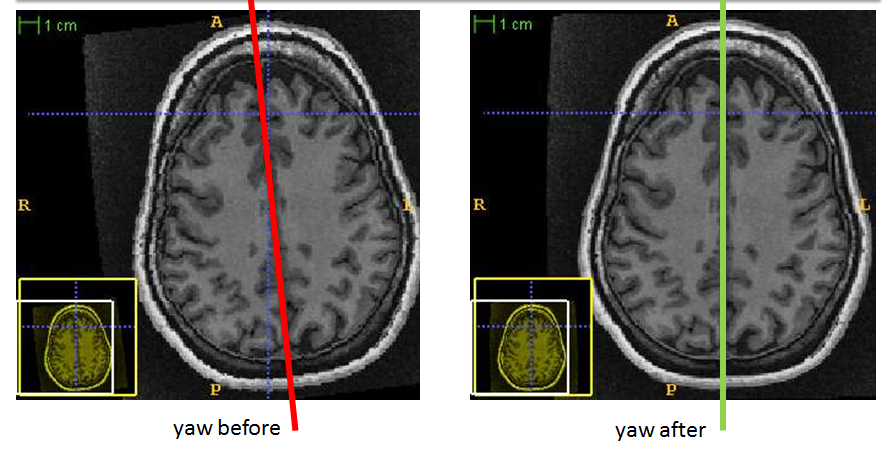
- Note: some brains have a curved longitudinal fissure so it may not be possible to get a perfect yaw, so we must create the best fit possible
Save ACPC rotation matrix file
- Click the ‘+’ button to return to the view where all brain orientations are visible
- Using the shift and elevate arrows, move the brain so it is roughly in the centre of each window
- Click save in the bottom left corner, and save over the old matrix file (note: only one matrix file can exist in each session directory)
- If no changes were made to the pitch, roll or yaw then simply close ITK-Snap without saving
Files and Parameters
Output files
| Filename |
Description |
|---|
| {session}_T1_IHCpre_toACPC.mat |
If changes are made to the matrix file, save over {session}_T1_IHCpre_toACPC.mat so there is only one .mat file located in the subject directory |
Quality Check
| Filename |
Description |
|---|
| {session}_T1_IHCpre_toACPC.mat |
Check that the ACPC rotation matrix has correctly rotated the T1 by checking the pitch, roll and yaw |