Stage 6: Tissue segmentation

|
Stage summary: The tissue segmentation mask is automatically created in T1 acquisition space {session}_seg with grey matter (GM) labelled as 4, white matter (WM) labelled as 3, and cerebrospinal fluid labelled as 5. In order to differentiate ventricular CSF (vCSF) from sulcal CSF (sCSF) manual reassignment of vCSF is required. In order to obtain the supratentorial TIV (ST-TIV) volume, the brainstem, cerebellum and other subtentorial tissue must be removed manually |
Ventricle reassignment and cerebellum removal video demo
Ventricular Cerebrospinal Fluid (vCSF) reassignment
Procedure Overview
- Open ITK-Snap
- Load the final inhomogeneity corrected greyscale T1 {session}_T1_IHC
- Load the segmented tissue mask {session}_seg
- Reassign the ventricles using the flood fill tool
- Save the new tissue segmentation {session}_seg_vcsf
Load greyscale T1 and tissue segmentation
- Load inhomogeneity corrected greyscale T1 {session}_T1_IHC
- Expand axial window by clicking ‘+’
- Adjust image contrast if necessary (CTRL-I)
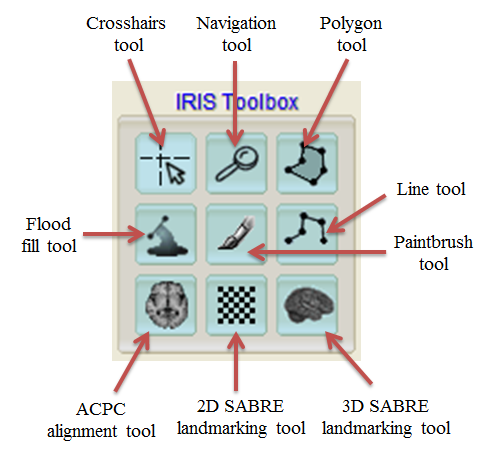
- Pan (left-click and drag) and zoom (right-click and drag up or down) using the ‘Navigation tool’
- Click Segmentation > Load From Image... and select {session}_seg
Ventricular reassignment
- Click ‘Flood fill tool’
- To toggle between flood filling (green arrow tip) and drawing limits (red arrow tip), press the spacebar
- Change ‘Active drawing label’ to Label 7
- Change ‘Draw over’ to Label 5
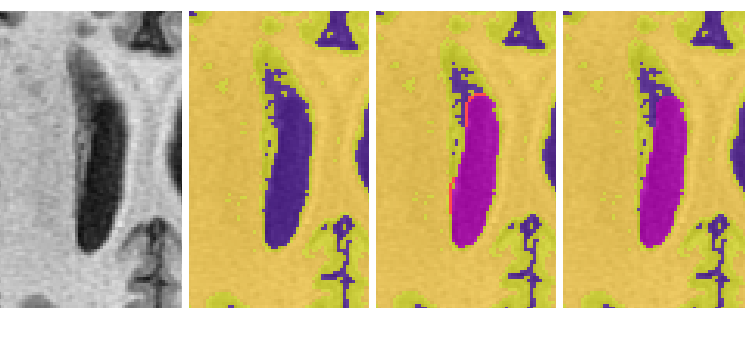
- Start at the most superior slice showing ventricle, enable flood filling (green arrow head) and left-click the ventricle to flood fill
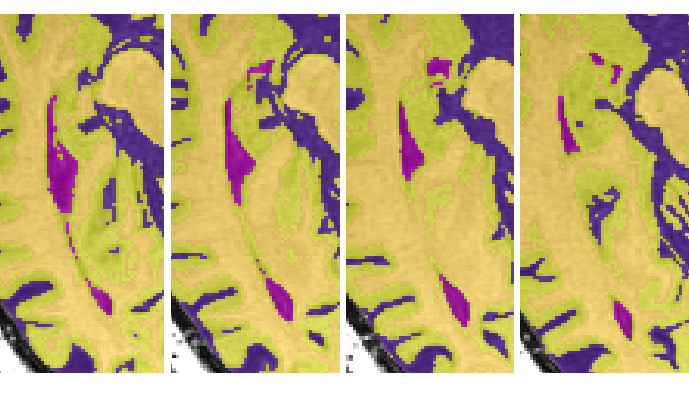
- Use the limit drawing limit tool when the ventricles are connected to sulci or CSF intense lesion, limit the ventricle using the limit drawing option
- Press spacebar to turn the arrow tip red
- Left-click to place the limit starting point
- Left-click in a second location to place the second point and the 2 points will be connected with a red line. Continue until the limit is complete
- Press spacebar to switch to flood fill and relabel the ventricle
- To erase limits, click ‘clear limits’ in the bottom right corner of the window
- In order to create separate limits on the same slice, you must press spacebar after completing each limit, then press spacebar again to enable limit drawing (i.e. first limit, spacebar, spacebar, second limit)
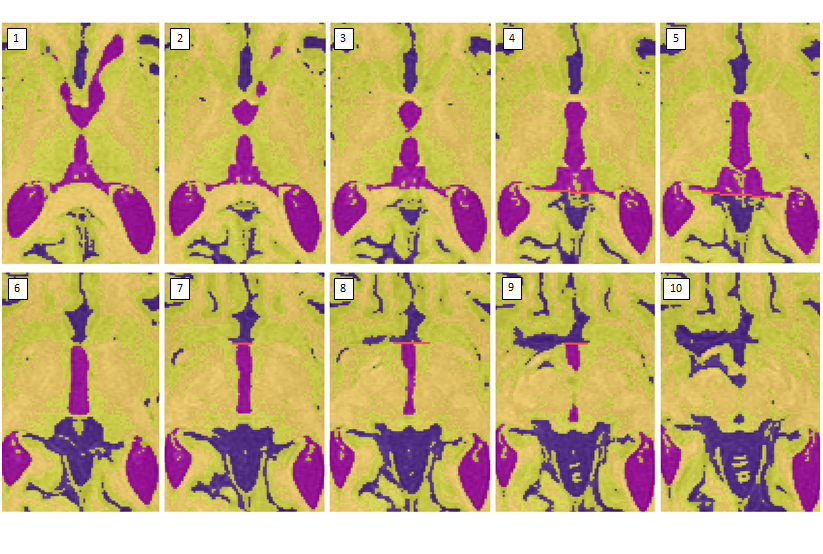
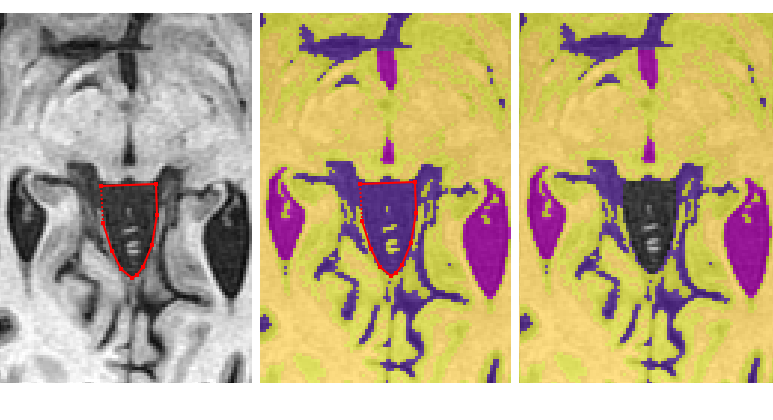
Reassigning the 3rd ventricle
- Once the cistern has connected to the cerebellar CSF, draw a horizontal limit following the natural border on the slice above (see images 3-5)
- Stop taking the cistern once the PC completely separates it from the 3rd ventricle (see image 6)
- When the 3rd ventricle connects to the longitudinal fissure, draw a horizontal limit (see image 7-9)
- Stop taking the posterior portion of the third ventricle when it becomes circular (i.e. has turned into the cerebral aqueduct)
- Stop taking the anterior portion of the 3rd ventricle when the posterior portion has become circular or when the anterior portion has become indistinguishable from the longitudinal fissure/surrounding sulci (see image 10)
What not to reassign as vCSF:
- CSF intense lesion adjacent to the ventricles
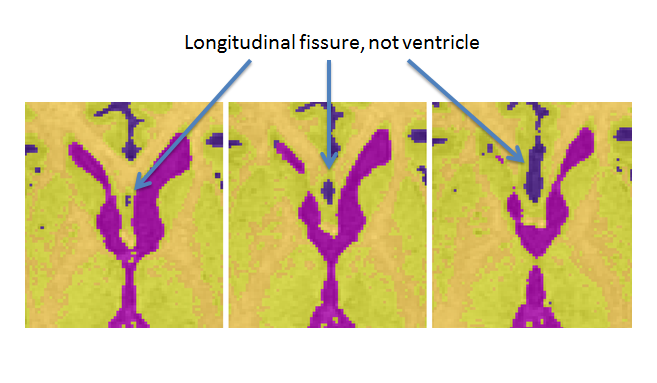
- The longitudinal fissure may resemble ventricle in superior slices. Note: when unsure whether an area is ventricle or not, it may be helpful to scroll through surrounding slices where the issue may be less ambiguous
- The anterior portion of the lateral ventricle frequently connects medially to the CSF surrounding the brainstem. Scroll through surrounding slices to be sure that only ventricle is being reassigned. (Note: be sure to continue to select the posterior portion of the lateral ventricle once it separates from the whole)
Save the edited segmentation as {session}_seg_vscf
Cerebellum removal
In order to obtain the supratentorial TIV (ST-TIV) volume, the brainstem, cerebellum and other subtentorial tissue must be removed manually
Procedure overview
- Open {session}_T1_IHC and load {session}_seg_vcsf or simply continue from where we left off in the previous section
- Begin removing the brainstem and cerebellum using the ‘Polygon Tool’ starting from the middle of the brain and moving inferiorly
- Save edited segmentation as {session}_seg_vcsf_st
Open files
- Continue using the {session}_seg_vscf segmentation or reload it over the {session}_T1_IHC if it has been closed
- View the brain in axial view
Using the polygon tool
- Click ‘Polygon tool’
- Change ‘Active drawing label’ to ‘Clear Label’
- Change ‘Draw over’ to ‘All labels’
- Toggle the segmentation by clicking ‘S’ and perform the tracings over the T1 image, not the segmentation
- Select your starting point by clicking on the segmentation
- To create a line, click a different spot on the segmentation and a line will connect the 2 points
- Clicking a 3rd time will create a closed shape where the centre is what will be changed based on the drawing labels selected
- Continue until you have outlined the area you wish to modify
- Right click to complete the polygon and click ‘accept’ in the bottom left corner to finish, or ‘delete’ to cancel polygon
- NOTE: If supratentorial tissue or fluid is accidentally removed, it can only be brought back by clicking ‘Undo’ or CTRL-Z. However, you can only go back a limited number of steps and if the error falls outside of this window, then you must restart the cerebellum removal. This is why it is important to save the segmentation file after completing the ventricle reassignment
Begin from the top of the brainstem/cerebellum
Depending on the pitch of the brain, there are a few different ways to start removing the cerebellum
If the cerebellum appears before the brainstem separates from surrounding tissue
- Find the most superior slice where the cerebellum appears
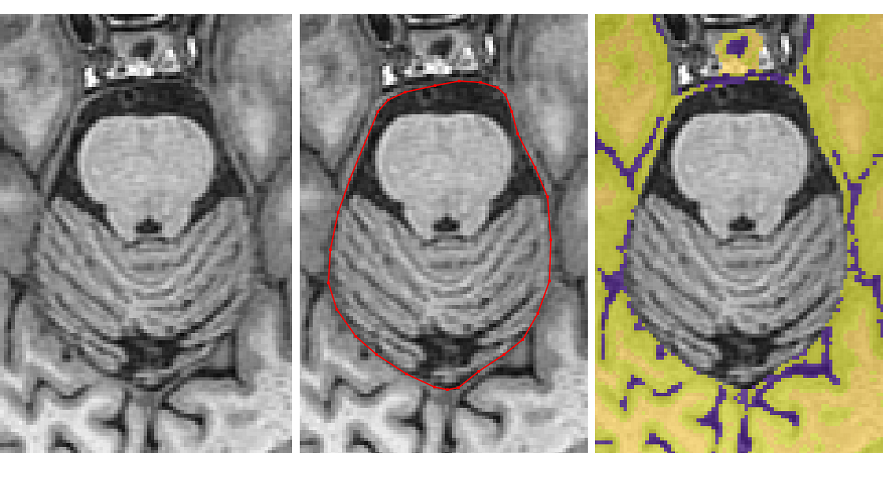
- Using the ‘Polygon tool’ follow the dura surrounding the cerebellum going as anterior as the colliculi
- Cut straight across the colliculi
- Continue down until the brainstem has a clear border and then remove both together
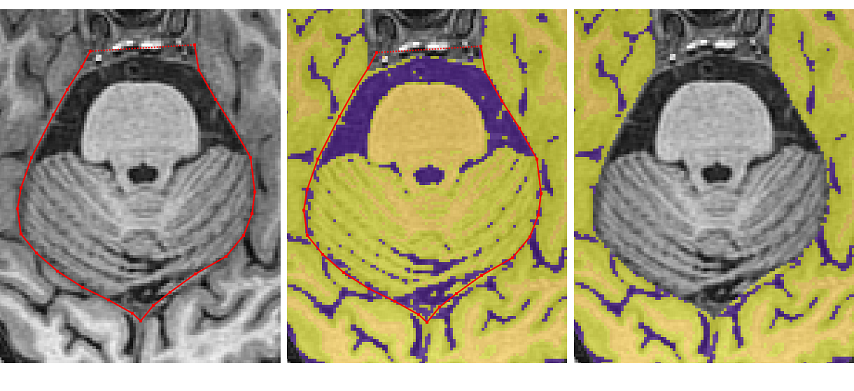
If the brainstem separates from the surrounding tissue before the cerebellum appears
- Find the most superior slice where the brainstem has a distinguishable border surrounding it (i.e. the cerebral peduncles have separated from the surrounding tissue)
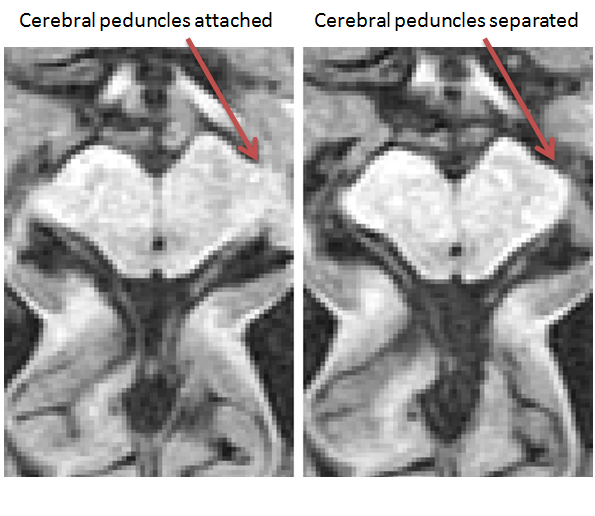
- Using the ‘Polygon Tool’, begin by clicking on the most anterior part each cerebral peduncle so a line connects the 2 points
- Continue by outlining the brainstem
- Once the cerebellum starts to appear, take both regions together

If the brainstem and cerebellum are clear on the same slice, then start by taking them both together
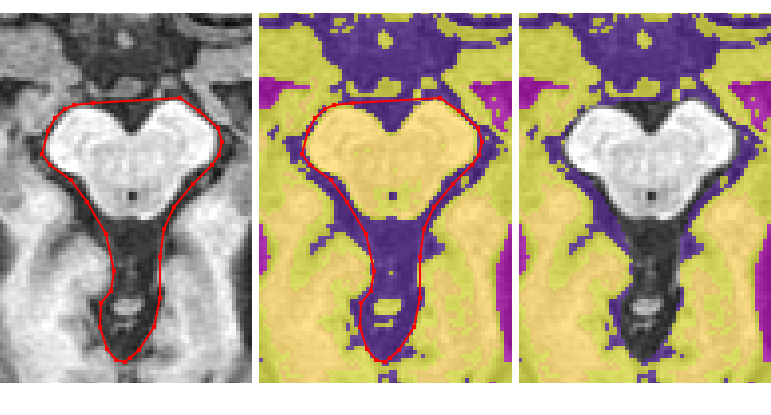
Removing the rest of the cerebellum
Continue removing the cerebellum and brainstem in this way until the anterior dura becomes clear
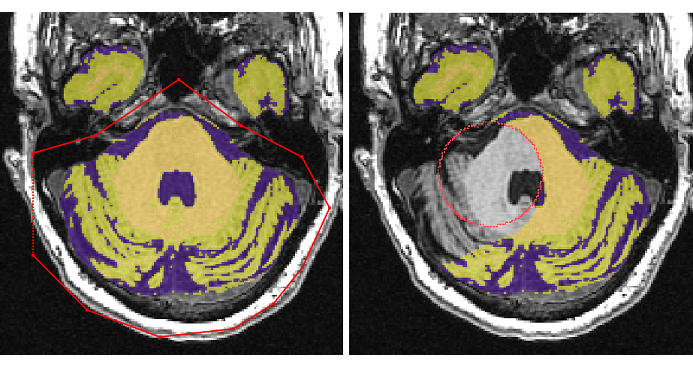
Now remove the CSF between the dura and the cerebral peduncles by including it in the polygon
Once the pituitary disappears, remove the dura connecting the temporal lobes
- When the cerebellum separates the temporal and occipital lobes, the tracing should exit from the middle of the brain to remove the non-brain tissue

- Once the temporal poles separate from the cerebellum and the occipital pole disappears, the ‘Polygon tool’ can be switched to the ‘Paintbrush Tool’ for quick removal of the rest of the cerebellum and spine
Save edited tissue segmentation
- Once the ventricles are properly reassigned and the subtentorial tissue removed, save the tissue segmentation as {session}_seg_vcsf_st
Files and parameters
Input files
| Filename | Description |
|---|---|
| {session}_T1_IHC | T1 MRI with second N4 inhomogeneity correction |
| {session}_seg | Tissue segmentation in T1 acquisition space |
Parameters
Output files
| Filename | Description |
|---|---|
| {session}_seg_vcsf | Tissue segmentation in T1 acquisition space with ventricles reassigned |
| {session}_seg_vcsf_st | Tissue segmentation in T1 acquisition space with ventricles reassigned and the and all subtentorial tissue removed resulting in only the supratentorial voxels |
Quality check
| Filename | Description |
|---|---|
| {session}_seg | Check that the grey and white matter is properly segmented. Misclassification may occur with poor scan quality or T1 artifact |